

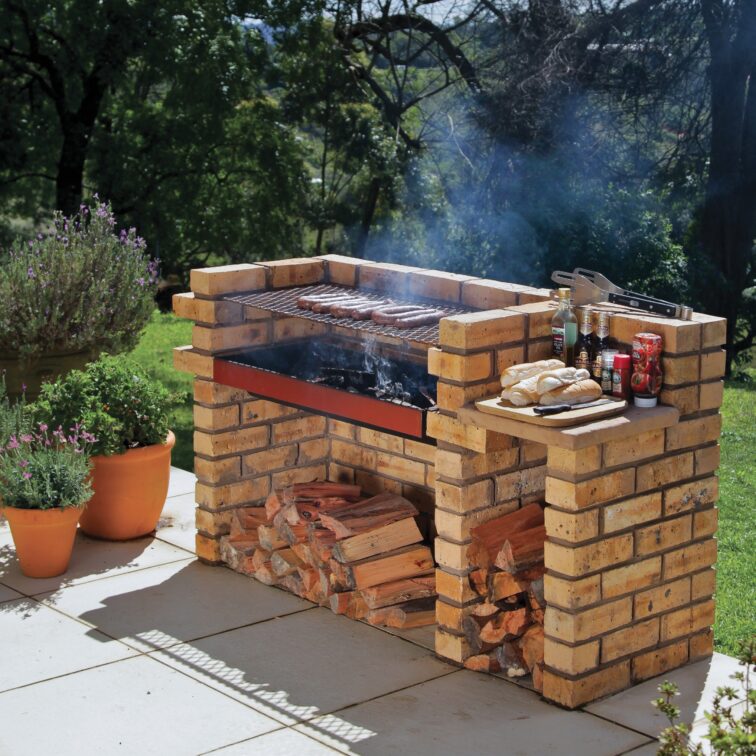
Build Your Own Clay Brick Braai
Get ready for the summer with an upgraded outdoor space for entertainment. Build your very own clay brick braai and you’re sure to enjoy the festivities of your space for many years to come.
![]()
![]()
![]()
![]()

One of the simplest ways to bring your new braai to life is to follow professional guidance. Clay Brick presents an easy-to-follow plan which provides all the steps you need to follow. Study the instructions and drawings before starting. This project has been kept as simple as possible and can be completed in a weekend.
Each stage has been illustrated with drawings. The plan and elevation drawings show the overall dimensions of the braai, and the perspective drawing shows how it looks on completion.
A copy of the book ‘Clay Bricklaying is Easy’ is available from ClayBrick.org for instructions on mixing sand and mortar and techniques for handling tools. For the Stainless Steel elements contact Botany Stainless Steel Products.
So, ready to begin?
1. Foundation
If you have a hard level floor as in the corner of a patio, it will be all the foundation you need to set the bricks out. However, if you are working on ground, clear and level an area of about 150mm wider all around than the size of the completed braai area.
Then excavate about 2-courses deep (160mm) and fill with bricks and mortar. Check levels all the way. Allow to dry for a few hours.
2. Setting Out
Set out the back line by stretching a line between two bricks. The distance between the inside faces of the bricks should be equal to the length of the braai.
Use a square to take a line off at a right angle from the inner corner of the right-hand brick (see illustration). Measure off the
width against this line and secure the line with a brick. Use a pencil to mark the two lines you have set out.
Place Clay Bricks loosely, allowing 10mm gaps for mortar against the back and side lines. From this square base you can
now complete the perimeter set of brickwork as seen in the drawing for the 1st course. Once this is done, remove the loose
bricks and start laying the Clay Bricks in mortar.
3. Laying the Courses
For simplicity, the plan shows you exactly how the Clay Bricks are to be laid in each course, allowing for a 10mm joint per course. Spread the mortar evenly. Constantly check levels and plumb. Strike the joints with the tip of a trowel to keep them neat. Watch for positioning of steel lugs and bars.
4. Laying Quarry Tiles
The quarry tiles are laid on the bottom of the fire box and around the top edge of the grille on a bed of mortar about l0mm thick. Check with spirit level and tap down with trowel handle where necessary. Work mortar into joints and clean off with dry cloth and broom.
5. Laying the Mini-Tiles
These cover part of the top of the braai to form a working surface. Lay a bed of mortar and strike off level with a board. The mini-tile sheets have a net backing for easy handling. For the grouting, mix a jam tin of cement with a quarter tin of water to form a creamy paste.
Proceed as follows:
a) Lay the sheets of tiles against each other on the mortar bed.
b) Cut the net backing with a knife to remove excess tiles.
c) Trowel on the grouting mixture and work into the joints.
d) Wipe tiles clean with dry cloth or soft paper.
THAT’S IT!
Fit the steel plate, grille and fire-grate on the lugs. Clean up the site. Wait three days for mortar and grout to dry out before making your first fire.
![]()
![]()
![]()
![]()
For more visit Clay Brick.


You might also like...
-
Bespoke Outdoor Entertainment Space by Interior Fusion: Where Design Meets Durability

In South Africa, outdoor entertainment spaces are expected to deliver far more than visual appeal. This bespoke outdoor entertainment space needs to be practical, durable ...
-
Designing Summer Spaces with Infinity Porcelain Cladding for Seamless Living

As summer settles in, our homes naturally open up to a more relaxed, fluid way of living. Long lunches drift outdoors, kitchens spill onto terraces, ...
-
Celebrate Valentine’s Day with the Warmth of Morsø

Valentine’s Day invites us to slow down, savor connection, and create moments that feel both intimate and unforgettable. Few elements set the mood quite like ...
-
EvaLast: What ROI Really Means in Home Renovations (And How to Calculate It)

Home renovations often begin with a feeling. A deck that no longer reflects the way you entertain. A home that functions perfectly well but feels ...


Visit SA Decor & Design on social media


