
Roof Design for Solar Panel Integration Without Spoiling a Home’s Exterior
A good roof can carry solar panels without making a home look patched together. The best roof design for solar panel integration starts with roof shape, panel placement, color matching, mounting height, and clean cable routing. It also works better when the whole-home energy plan is considered early, from efficient hot water systems such as SunScan Heat Pumps to the way panels are positioned on the most productive roof planes. When solar is treated as part of the architecture, the result feels intentional rather than added later.
Roof Design for Solar Panel Integration Starts With the Roofline
Solar panels on roof surfaces become visually awkward when they fight the roofline. A large gable roof with panels scattered across three planes may work technically, but it can look restless from the street. A simpler solar roof design usually looks better because the panels follow one clean rectangle or two balanced zones.
For homes still in the planning stage, the roof should be shaped with solar in mind. Long, uninterrupted planes give installers more freedom, whether the system includes photovoltaic panels, Solar Geysers, or both. Dormers, vents, chimneys, skylights, and decorative roof breaks may add character, but they can split the solar area into small fragments. That makes the array harder to align and easier to notice.
A practical rule is simple: if the panels can sit like one calm geometric shape, the roof will usually keep its exterior appeal.
Choose the best roof plane
Sunlight is the first component of the technical aspects of residential solar panel design. Typically, north-facing roof planes in South Africa get the highest exposure to the sun for a day. Even planes facing east or west can function, particularly if a home consumes more electricity during the morning or late afternoon. Planes are typically less productive facing the sun to the south.
Pitch matters too. A roof that is too flat may need tilted mounting frames, which can be more visible from the street. A very steep roof can make panels more prominent and harder to service. Many homes work best when the roof pitch allows panels to sit close to the surface without heavy framing.
| Roof factor | Better for exterior design | Risk to avoid |
| Orientation | One main north-facing plane | Panels scattered across small planes |
| Pitch | Panels sitting close to the roof | Tall frames visible from below |
| Shade | Clear roof area from 9 a.m. to 3 p.m. | Trees, chimneys, and parapets cutting output |
| Roof shape | Simple rectangle or balanced gable | Too many breaks and roof features |
The visual lesson is clear: energy production and design quality often improve from the same decision – a clean, open, well-oriented roof plane.
Solar panel integration without spoiling a home’s exterior
Solar panel integration should feel like part of the home’s original design. The easiest way to achieve that is to match the panels to the roof as closely as possible.
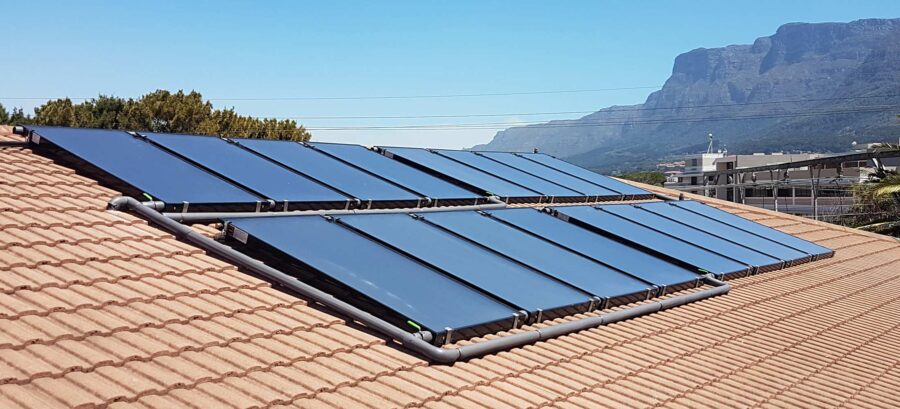
Black panels on a dark charcoal, slate, or black metal roof often look calm and architectural. Silver-framed panels on terracotta tiles can look more visible because the contrast is stronger. That does not mean a light roof cannot carry solar well. It means the layout must be more disciplined.
For a refined home solar panel design, focus on these details:
- Use all-black panels where the exterior style allows it.
- Keep the array edges aligned with gutters, ridges, or roof hips.
- Avoid one-panel gaps unless a vent or safety clearance requires them.
- Place visible conduits under eaves or in less noticeable routes.
- Keep panels away from the most decorative front-facing plane when another productive plane is available.
A small design test helps here. Stand across the street and look at the home as a whole. If the panels form a neat block, the eye reads them as part of the roof. If they appear as scattered objects, the installation starts to dominate the exterior.
Home exterior details that make solar panels on roof areas look intentional
The best installations are often quiet. They do not try to hide every panel. Instead, they use symmetry, repetition, and proportion so the panels feel planned.
A simple design process can prevent most visual problems:
- Mark the roof planes visible from the street.
- Identify the strongest solar planes.
- Remove panel zones broken by vents, chimneys, or heavy shade.
- Build one or two clean rectangular panel groups.
- Check the view from the driveway, garden, and main road.
- Move minor roof elements before installation where possible.
- Confirm cable paths before mounting starts.
There is one detail homeowners often miss: roof hardware. A vent pipe in the middle of a strong solar plane may force an installer to split the array. Moving that pipe during roof renovation may cost less than accepting an awkward layout for 20 years.
Another overlooked point is roof age. If the roof will need replacement soon, solar should wait until the surface is repaired or renewed. Removing panels later adds labor, cost, and risk. Good roof design for solar panel planning looks at the next decade, not only on the installation day.
Roof design for solar panel options: mounted panels, solar tiles, and BIPV
There are three common design directions: standard-mounted panels, low-profile panels, and building-integrated photovoltaics. Each has a different balance of cost, output, and appearance.
| Option | Best use | Design trade-off |
| Standard-mounted panels | Most homes with suitable roof space | More visible, but cost-effective |
| Low-profile dark panels | Modern homes and visible roof planes | Cleaner look, may need careful mounting |
| Solar tiles or BIPV | New builds, premium renovations | Better visual blend, often higher cost |
Also known as BIPV (Building Integrated Photovoltaics), they can be built into parts of the building instead of on top of it. Solar roof products and solar tiles may be more inconspicuous than conventional solar panels, but they’re not the most cost-effective options. Many homeowners will still be better off with a standard array, but in a well-arranged format.
The main design mistake is choosing the most invisible product without checking the output and cost. A discreet solar roof that produces less energy may need more surface area. That can reduce the visual advantage.
Check the roof plan
Before approving a layout, homeowners should ask for two drawings: a technical roof plan and a simple street-view mockup. The roof plan shows output logic. The mockup shows whether the home still looks balanced.
A useful mini-audit includes:
- Panel block shape: Does it look orderly?
- Street visibility: Is the array on the most public-facing roof plane?
- Color contrast: Do panels and roof material compete visually?
- Edge alignment: Do panels follow the roof geometry?
- Service access: Can installers reach the array without damaging finishes?
- Future changes: Will a skylight, extension, or tree growth create problems?
This audit is quick, but it often catches problems that a production estimate misses. A system can perform well on paper and still look poorly planned from the street. The better result comes from checking both.
Solar roof design should look planned
Don’t compromise the exterior style of a home to get solar. A clean roof plane, perfect roof orientation, low visual contrast, neat cable routing and mounting, and tidy routes are the key elements of the right roof design for solar panels. The quietest is typically the strongest: panels oriented with the architecture, integrated where they fit, and are part of the home’s overall energy plan.
For homeowners building or renovating, the best time to plan solar is before the roof is finished. That is when vents can move, roof planes can be simplified, conduits can be hidden, and panel groups can be shaped to suit both performance and curb appeal. Thoughtful roof design for solar panel integration protects the home’s appearance while preparing it for lower energy demand over time.
![]()
![]()
![]()
![]()


Visit SA Decor & Design on social media


