

Swartland: Crazy About Cornices
Swartland, a leading supplier of a wide range of products to the building industry, has recently launched a new range of polystyrene cornices. We speak to Swartland’s Warren Budde for some advice for those in the market for new cornices.
![]()
![]()
![]()
![]()
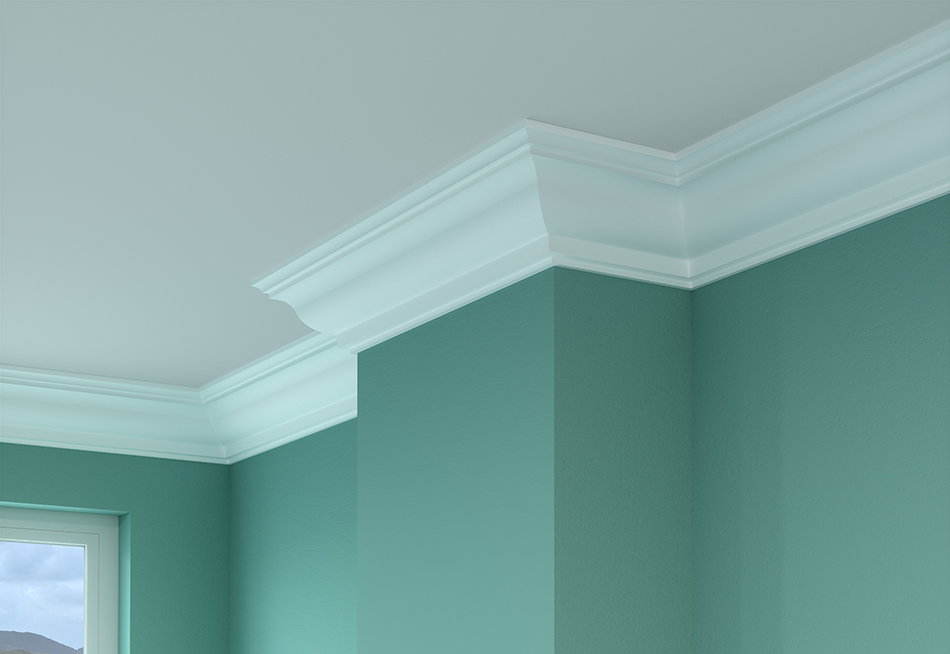
 Cornices, otherwise known as ceiling coving, are decorative structures that create a smooth and aesthetically pleasing transition between ceiling and wall. Cornices come in a variety of styles, and each one will create a specific look in a room. Warren Budde, from Swartland, says: “Swartland is excited to announce that it has recently added a full range of quality polystyrene cornices to its ever-popular Col Brand. Available in eight different profiles, the new cornices are made from environmentally-friendly CFC-free XPS polystyrene, which makes them lightweight, easy to install and easy to paint.” He notes that adding cornices is a great way of enhancing home décor, as well as being an effective way of hiding settlement cracks between walls and ceilings.
 ![]()
![]()
![]()
![]()
 Material choices Traditionally, plaster cornices were your only choice – they were comparatively heavy, fragile, and complicated, messy and time consuming to install. Polystyrene on the other hand, is a far better choice of material for cornice applications, says Warren: “Choosing polystyrene cornices offer many benefits, including the fact that they are waterproof, lightweight, simple, quick and easy to install and paint, affordable, and they require minimal labour or skill for a perfect end result. What’s more is that in South Africa, polystyrene cornices are far readily available in a wide selection of profiles, while plaster cornices are only available in very few. “Plaster cornices require installation with nails, so you have to use ready-mixed crack filler to fill in the dents where the nails were installed. Polystyrene cornices on the other hand, only require adhesive to fix them in place. Plaster cornices are quite brittle, and so they tend to dent and break easily. If handled roughly, polystyrene can also dent relatively easily, however, if handled with care, dents are unlikely, and in the event of any dents occurring, they can be quickly and easily fixed with ready-mixed crack filler as well.”
 ![]()
![]()
![]()
![]()
 Height and style of the cornice Before making your cornice selection, it is imperative to first consider the design and environment of the room. Warren explains: “Some important things to consider include the style of the room or the period you wish to emulate, the height of your ceilings, and of course, the size of the room in question…Tall ceilings and large rooms are ideal for richly detailed and decorative cornice styles. The more ornate cornices tend to fill the emptiness effect that can be caused by high ceilings or large spaces. Normal to low ceilings, and more compact rooms, however, should be finished with minimalistic or thin cornice profiles so as to prevent the height and size from visually shrinking even further. Installing polystyrene cornices One of the many benefits of polystyrene cornices is that it makes for easy installation. All you require for such a project is a mitre box, a polystyrene saw, a tape measure, a caulking gun, a chalk line, a sponge, polystyrene adhesive, and of course the polystyrene cornicing. Here are a few tips: Mitring the cornice: The cornice is always placed in the mitre box “upside down”, so that the edge that will be fixed to the ceiling lies on the horizontal base of the box. There are two main cuts that will be necessary to complete any cornice installation. The first is the simple straight cut, which is when you cut the cornice straight across using the 90° guide – it is used to join two straight lengths of cornicing. The second type of cut is used to cut the cornices at an angle of 45° to fit in the corners – or in other words, to mitre them. For the corners, there are internal mitres, which fit in the corners of a room, as well as external mitres, which run along corners that jut out, such as on a chimney column for example. When cutting polystyrene cornices, always use firm, positive strokes, and never try and force the cut or to cut too quickly. Application of adhesive: It is essential that sufficient adhesive is applied along the full length of the back of the edges of the cornice where it will meet both the wall and the ceiling. To be sure – you should always check the suggested coverage on the adhesive’s packaging and apply accordingly. Fitting the cornice: One of the most common mistakes made when fitting cornices, is to follow the ceiling. Do not be tempted to do this, as ceilings are often not entirely level. To ensure a properly horizontal line all the way round a room, determine the drop down from where the cornice will be fixed, down to the floor, and using the chalk line, draw a line around the room marking this position. Then, using the chalk line as a guide, push the cornice firmly in place. Painting cornices: Polystyrene cornices can be painted approximately one hour after installation.
 ![]()
![]()
![]()
![]()
 Contact: Swartland.


You might also like...
-
Warm Up This Season with Helios Fire at Lourensford Market

As the chill of winter settles in, there’s something magnetic about the gentle crackle of a fire. This season, visitors to the Lourensford Market are ...
-
Press Up Industries: Dopamine Decor: Elevate Your Space with Joyful Details in Antique Copper

The trend of dopamine decor—designing spaces that spark joy and boost mood—is transforming interiors with bold colors, tactile textures, and statement pieces. While the spotlight ...
-
Built-In Comfort with Samsung Aircon Heating Solutions

As the cooler days of winter settle in, creating a warm and inviting home environment is essential. With Samsung Aircons, you can enjoy the perfect ...
-
Coloured by Earth – The Secret to Thousands of Shades From ProNature South Africa

Mineral pigments! It is simply amazing what Mother Earth has in stall for us. Rich, beautiful colours, delicate hues and subtleness for any ...


Visit SA Decor & Design on social media


