
How to create a custom wonderwall with Leroy Merlin.
If you’re looking for a unique way to turn a bland wall into a wonderwall, then read on to learn how the team at Leroy Merlin can help you transform an ordinary wall in no time at all.
![]()
![]()
![]()
![]()
Here’s how to transform your wall with custom wallpaper squares, step by step.
“This original and not very frequent way of using wallpaper consists of creating pictures with wallpaper and wooden mouldings that you will have to place as a frame to decorate the walls. You will give life and, above all, volume – the main characteristic regarding wallpaper pasted on walls – to the surface you choose to place the mural on,” says the team at Leroy Merlin.
For the project, you will need:
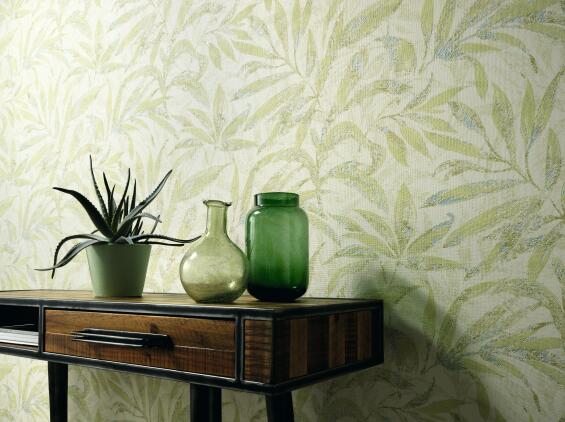
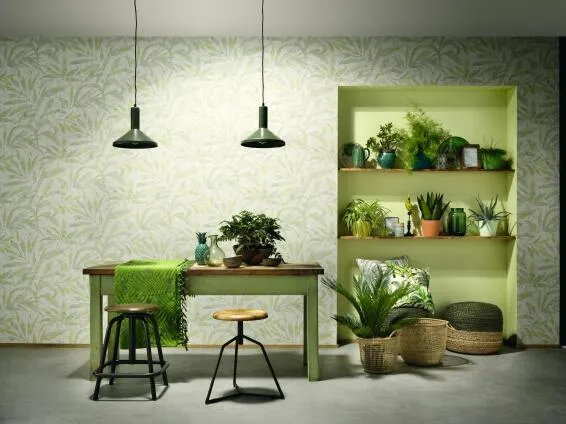
- Tropical Wallpaper
- Molding e21 64x28mm 1x2m
- Glue-ready vinyl paper 5kg benkola
- Glue ready for vinyl paper 1kg
- Plaster adhesive
- Cutter
- Sponge
- Spirit level
- Ruler or metal square
- Pencil
- Mountain range
- Plain p & t kit + tape
Start by cutting the wallpaper. Spread the strip of wallpaper on a work table and mark the length you want to take to the wall with this decorative frame. Cut as many pieces as you need with the help of a ruler or metal square and a cutter.
For the narrower pads, you just have to cut two identical strips that will be approximately 50cm wide, which is the standard measurement for wallpaper rolls. The central panel is twice as wide, that is, 1m because it consists of two strips. To cut them correctly you must take into account the reason for the case paper. To do this, cut a strip and match the drawing of the second paper strip on the exposed side. Glue them with a little painter’s tape so they don’t move, mark and cut the second strip to the same size.
Next, Apply the appropriate glue to the back of the wallpaper with the help of a roller or flat brush.
Now you can stick the strips of wallpaper to the wall in the position you have decided (and that you will have previously marked on the wall so that each panel is at the same distance and height. Help yourself with a level). Start by attaching the top edge of the strip, and then pinning the paper from top to bottom and inside to outside, smoothing it down with a sponge or soft cloth to prevent wrinkles and bubbles from appearing.
Next, you will frame the wallpaper with the mouldings to create a frame. Take measurements of each of the edges of the wallpaper rectangles and transfer them to the chosen plaster mouldings. They will be the framework of each piece.
Using a handsaw, cut each of the pieces, and then use a metal square to mark each end at an angle so that the joint of all the slats is finished with a mitre. Cut with the saw.
Lastly, apply a strip of plaster adhesive to the back of each slat and place them in place on the wall (so they are perfectly straight and level with each other using a level), over the edge of the wallpaper, so that it does not lift in no case over time. Pay attention to the corner joint so that the mouldings fit properly.


You might also like...
-
Can You Wallpaper a Bathroom? Expert Tips for a Durable, Elegant Finish

In a quietly confident shift away from cold tiles and purely functional finishes, the modern bathroom is being reimagined as a space of expression—layered, decorative, ...
-
Mavromac Presents Gastón y Daniela West 2026: A Textile Collection Inspired by Heritage, Landscape and Craft

Textiles have long served as storytellers within the interior, carrying traces of culture, craft, and place through colour, pattern, and texture. For 2026, Gastón ...
-
The Art of Transformation: Inside the World of Wall Murals & Designer Wallpaper

In the evolving language of interior design, the wall mural has emerged not merely as decoration, but as narrative. Within the curated collections of Graham ...
-
Statement Walls, Reimagined: The Rise of Luxury Wallpaper in South Africa

Wallpaper is having a major moment — but this time, it’s elevated. South Africa’s design landscape is embracing luxury wallcoverings as transformative features that bring ...


Visit SA Decor & Design on social media


