

Step-by-Step Guide to Retrofitting a GROHE Trigger Spray
![]()
![]()
![]()
![]()
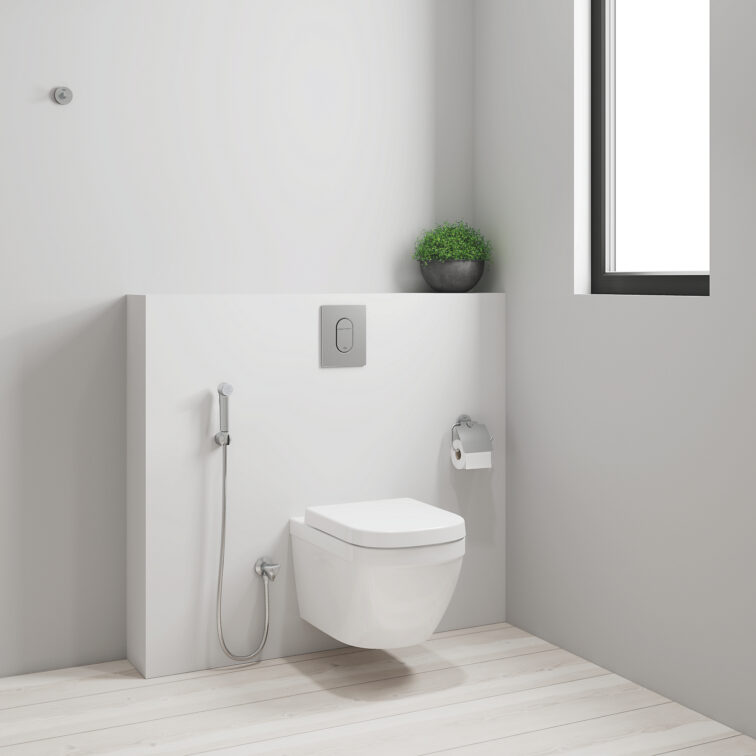
Retrofitting a GROHE Trigger Spray in your bathroom can be a convenient and efficient way to improve hygiene and comfort without requiring major renovations. This spray is versatile and suitable for a variety of purposes, such as personal hygiene, cleaning, and more. Here’s a simple guide on how to retrofit a GROHE Trigger Spray in your bathroom.
Why Choose GROHE Trigger Spray?
The GROHE Trigger Spray offers several advantages:
- Enhanced hygiene: A hygienic alternative to toilet paper.
- Convenient and versatile: Ideal for cleaning, personal hygiene, and family use.
- High-quality design: Durable and ergonomic with easy operation.
Step-by-Step Guide to Retrofitting a GROHE Trigger Spray
Step 1: Check Your Plumbing Setup
The GROHE Trigger Spray requires a cold water supply line near the toilet area. In some setups, an additional pipe or T-connector may be necessary to split the existing water supply. If your plumbing already includes a suitable connection, retrofitting will be even easier.
Step 2: Gather Tools and Materials
For a seamless installation, gather the following:
- GROHE Trigger Spray kit
- Adjustable wrench
- T-connector (if required)
- Teflon tape (for leak-proof seals)
Step 3: Turn Off the Water Supply
Before any installation, shut off the water supply to prevent leakage. This will usually be the valve near the toilet. Ensure all water has drained by flushing the toilet once after turning off the supply.
Step 4: Connect the T-Connector
Attach the T-connector to the existing water supply line. This will allow you to connect both the toilet and the trigger spray to the same water supply. Make sure to use Teflon tape on all threaded connections to prevent leaks.
Step 5: Attach the Hose
With the T-connector in place, connect the hose from the GROHE Trigger Spray to the open outlet on the T-connector. Use an adjustable wrench to ensure a tight fit, but be careful not to overtighten, as this can damage the threads.
Step 6: Mount the Spray Holder
Most GROHE Trigger Spray kits come with a wall-mounted holder. Choose a location near the toilet for easy access, then use screws or adhesive strips (as provided) to secure the holder.
Step 7: Test for Leaks
Turn the water supply back on and test the trigger spray. If any leaks are detected at the connections, tighten them as needed. Check that the spray functions properly and that the water pressure is appropriate.
Step 8: Adjust for Comfort
The trigger spray typically includes an ergonomic handle for ease of use. Once installed, adjust the positioning of the hose and holder for comfortable reach.
Maintenance Tips
- Check for leaks periodically to ensure all connections remain tight.
- Regularly clean the spray nozzle to prevent buildup.
- Turn off the water supply to the trigger spray when not in use, especially if it has a high-pressure flow. This can prevent accidental water flow, bursting of the hose and prolong the spray’s lifespan.
A Thoughtful Addition to Any Bathroom
A GROHE Trigger Spray is not only practical but also an eco-friendly choice for personal hygiene. With a few easy steps, retrofitting the spray into your bathroom can enhance cleanliness, convenience, and comfort.
Contact: Grohe


You might also like...
-
Elevate Your Home in True Luxury with Italtile

Renovating a luxury bathroom in South Africa often begins as a quiet longing—a dream sparked by late-night scrolling, beautifully curated mood boards, and that one ...
-
Why concealed cisterns are the future of modern bathrooms

For interior designers shaping contemporary spaces, the shift towards concealed systems isn’t just a trend – it’s a design evolution. A concealed cistern creates the ...
-
INVEST IN LITTLE LUXURIES TO MAKE STAYING HOME FEEL LIKE A TREAT

There’s something deeply satisfying about creating a home that feels comforting, beautiful and, most importantly, yours. And while we all love a full renovation reveal, ...
-
How to create a bathroom that Balances Beauty, Function and Timeless Appeal with Classic Luxury

Designing a bathroom that feels as good as it looks is no small feat. It’s one of the most used rooms in the home – ...


Visit SA Decor & Design on social media


